COME ON OVER AND JOIN US AT THE CRAFT CLUB
Welcome to my blog. I am an Independent Consultant for Close To My Heart Australia and Im here to share my creations, FREE Tutorials and love of Cardmaking, Scrapbooking, Paper craft and our exclusive range of products. Selling supplies direct to customers. No matter where in Australia you live, checkout the Close To My Heart Online catalogue, and please feel free to order and have it sent directly to your door. Thank you for stopping bye and please drop in regularly for new and exciting things.
Tuesday, October 27, 2015
Sunday, October 25, 2015
SPECIAL SALE METAL EMBELLISHMENTS FOR SCRAPBOOKING AND CARD MAKING
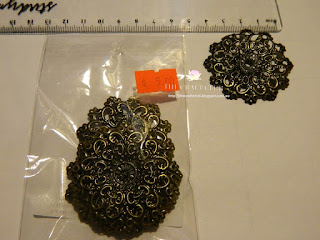
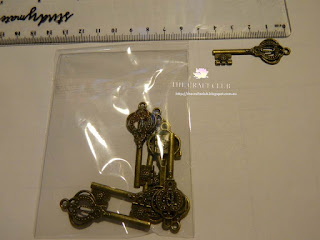
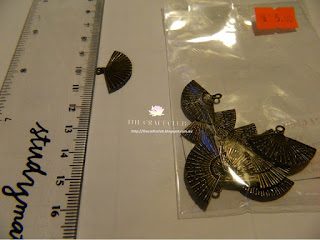
METAL SCRAPBOOKING AND CARDMAKING EMBELLISHMENTS
Keep checking back regularly for upcoming details.
Why not sign up for our mailing list in the post below.
LARGE BUTTERFLY (4)
SMALL BUTTERFLY (10)
MEDIUM COCRANE (10)
CORNER EDGE (10)
KEY (10)
LOVE PADDLOCK (10)
SMALL FAN (10)
LATCH SET (10 sets)
LONG CROWN (10)
SPECIAL SALE CLOSE TO MY HEART STAMP CLEANER AND SCRUB ONLY
Saturday, October 24, 2015
JOIN OUR NEW CRAFT CLUB MAILING LIST
Thanks for signing up!
Thursday, October 15, 2015
CLOSE TO MY HEART AUSTRALIAN CONVENTION 2015 - ARTIST TRADING CARD SWAPS AND INSTRUCTIONS - MIXED MEDIA ATC'S - CRICUT DIE CUTTING
One of the highlights of attending Close To My Heart Annual Convention each year is meeting up with other consultants and sharing our creations with each other. We do this via what we call "Swaps". Each consultant attending, makes themselves a certain amount of swaps and we swap our creations with each other, to inspire and share ideas on creations. These creations range from all sorts of projects, such as: Card fronts, Artist Trading Cards, Broaches, Jewelry, Mini Scrap pages and much much more. Its so much fun and one of the biggest high lights and
events attending convention.
This year i decided i would make and swap a Christmas Themed Mixed Media Artist Trading Card.
So firstly i started with Black Card stock and 1 B&T from the White Pines Paper Packet.
I used my cricut machine and Close To My heart Artiste Cricut Collection cartridge, To cut out the a tag in each set at 3.5" and i used our gorgeous Glitter paper to cut out the merry christmas set at 2".
I cut the white pines paper on an angle as shown below.
I made my own snowflake stencil by laminating a laminating pouch through my laminating machine when it was ready and ran the pouch through the machine twice.
Once the laminated pouch had sealed and cooled, i then placed it on a brand new Cricut Mat
and with a new cricut blade in my cricut. I used my Close To My Heart Artbooking Cartridge and from the Overlay section on the cartridge, picked out the desired overlay and in this case i set it to cut
at 3". I set my machine to cut at a speed @ 5 and my depth @ 5 and then set it to cut twice (2).
To cut out the stencil well. This stencil is reusable. After use, whether it be textured paste, or our spray pens or sponging technique. Simply rinse under cold water tap to clean it and then it is ready to be used next time around.
After i cut my white pines paper, i glued it down with our ctmh bonding glue.
Next step is to put the new stencil to work. N.B. Keep the snowflakes that were cut out
because you can use them for embellishments in your project or you can save them for another time but as most crafters, we don't throw anything away.
In the below picture you can see the jar of textured paste, now this is not a close to my heart product but you can buy it from any Bunnings Hardware Store for only $14.00
So using the back of the spatula, which i also brought from bunnings, i scrapped a small amount
of the textured paste from the jar and using the back of the spatula, i spread a thick layer of textured paste over the stencil which is in place.
Once you have spread your paste over the stencil, gently peel it backwards to wards you to protect the image underneath. As shown below.
I repeated the process to add more snowflakes as shown below.
Now i like to leave my creation to dry naturally and depending on how thick your textured paste is and the weather, it could take as little as 10mins. Or you can use your heat gun from a distance to dry it quicker or place it in front of the fan or under the air con, which ever you happen to have.
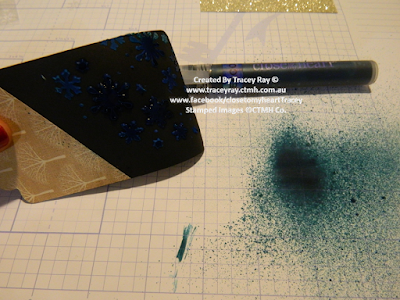
Once your textured paste has dried, I like to use our spray pens and reinkers to spritz them to colour the textured paste. I fill my ctmh spray pen to the 2nd last line on the bottle, then i use my reinker colour of choice, to fill it up, till the last line so that i have a really dense colour. Then spray my textured paste images. In this instance i have used the new Close To My Heart Exclusive Enchanted colour called Peacock. Drained the excess ink from the card, then laid it down flat to dry.
To finish of my Artist Trading Card, I embellished it with our Silver Foil tape and the Merry Christmas sentiment i had cut out as described above with our Close To My Heart Silver glitter paper and adhered it with our bonding glue. And finally got to add a bit of bling as well, so i added our Sequins Embellishments.
And finally, I placed each of my artist trading cards into and Artist trading card sleeve. I wanted to give each of my swapees an incentive to continue on collecting ATC's and swapping with others and collecting their own book of creations. This year i managed to make 80 swaps and am so excited to share with 80 other like minded consultants at the Close To My Heart Brisbane Australasian Convention 2015
Please feel free to either leave me a comment or ring me on mobile: 0402 507 121 or email me: traceyray@live.com.au
if you would like any help or advice on making your own CLOSE TO MY HEART MIXED MEDIA PROJECT
Saturday, October 10, 2015
CRICUT CUT DOILY HANDKERCHEIF FOLDED CARD MADE WITH CLOSE TO MY HEART SANGRIA PAPERS
Hello, Welcome to our Close To My Heart - Sangria Paper. I I hope you like the different Close to my Heart Cricut Collection sets that i have used just to show you how versatile #ctmh cricut cartridge sets can be and how you can incorporate many of them in one project. Scroll down to read all about it and to continue on with the blog hop.
FRONT INSIDE OF CARD
BACK OF CARD
Let me tell you all about this fantastic card. Firstly I would like to let you all know that this card was cut out completely on the Cricut Expression V2 using the Close To My Heart exclusive Cricut Art Philosophy Cricut collection cartridge. Everything from cutting out the Doily card base, the flowers and the leaves. The Birthday Girl and 13 was cut out of our stunning glitter paper and cut out using the Cricut Artiste Cartridge. A full tutorial is currently in the process of being created, so if you would like to personally make The Doily Handkerchief Card please come back and visit again some time.
The lacey Doily card base was cut out from the Cricut Art Philosophy Cartridge on page 69
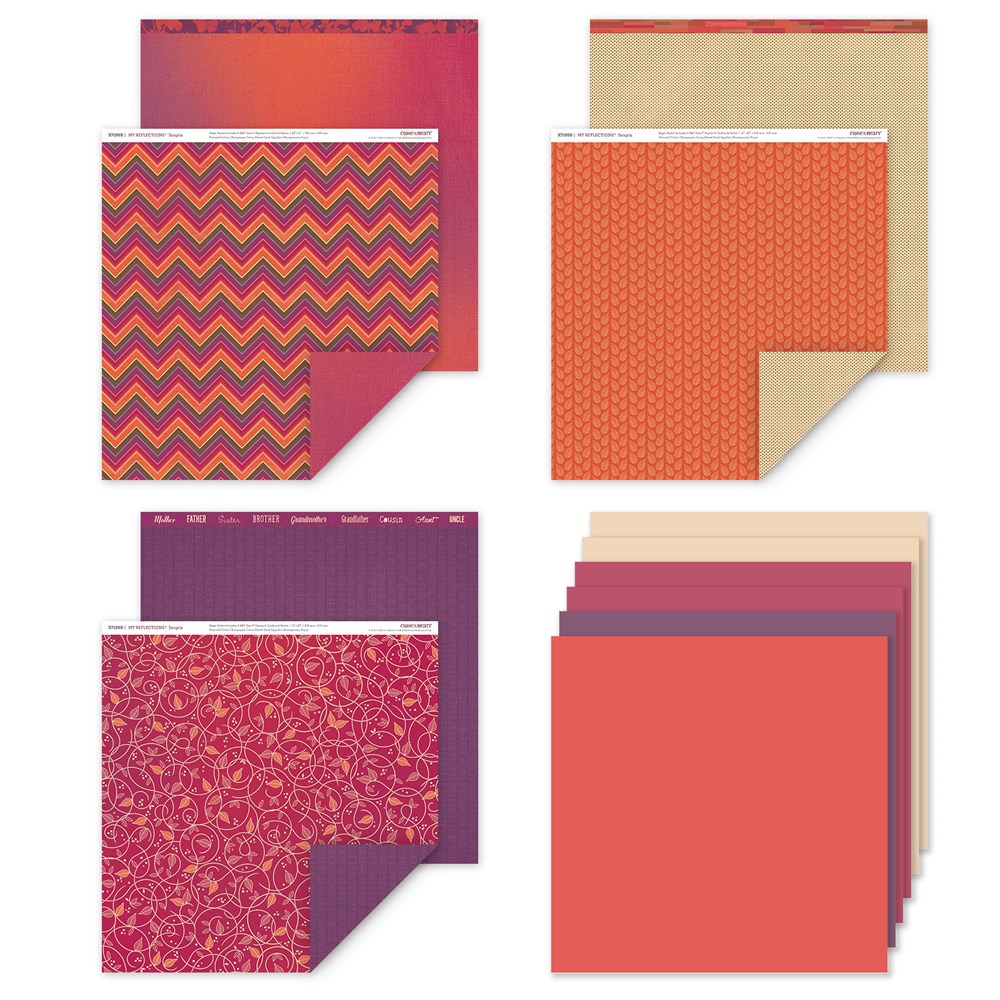
The gorgeous Sangria Paper Pack was used to high light and bring the creation to life. The cardstock colours are called Eggplant and Colonial White. Which are exclusive colours to Close to my heart and co ordinate beautifully with the sangria papers.
PRODUCT DESCRIPTION
Cutting versatile, foundational shapes is a breeze with the Art Philosophy Collection. The basic brackets, frames, flowers, and font included are perfect for any project, any time of the year. Use your cuts from this cartridge as embellishments on cards and layouts to make your artwork shine. And don't forget to use the coordinating stamps for more creative fun!
Collection includes:
1 – Cartridge (700 Images: Basic Shapes, Gift Items, and Font)
3 – My Acrylix® D-size Stamp Sets
1 – Enchantment Cardstock Combo Pack
The birthday girl was cut out from page 69 of the Cricut Artiste Cartridge
Make your artwork pop with the Cricut® Artiste Collection! Collection includes:
1 – Cartridge (700 Images: Themed Projects, Cards, Shapes, Gift Items, and Font)
3 – My Acrylix® D-size Stamp Sets
1 – Basics Cardstock Combo Pack Recommended blocks for included stamp sets: 3" × 3" (Y1006), 2" × 3½" (Y1009), 2" × 6½" (Y1010).
Cricut® is a registered trademark of Provo Craft & Novelty, Inc. All rights reserved.
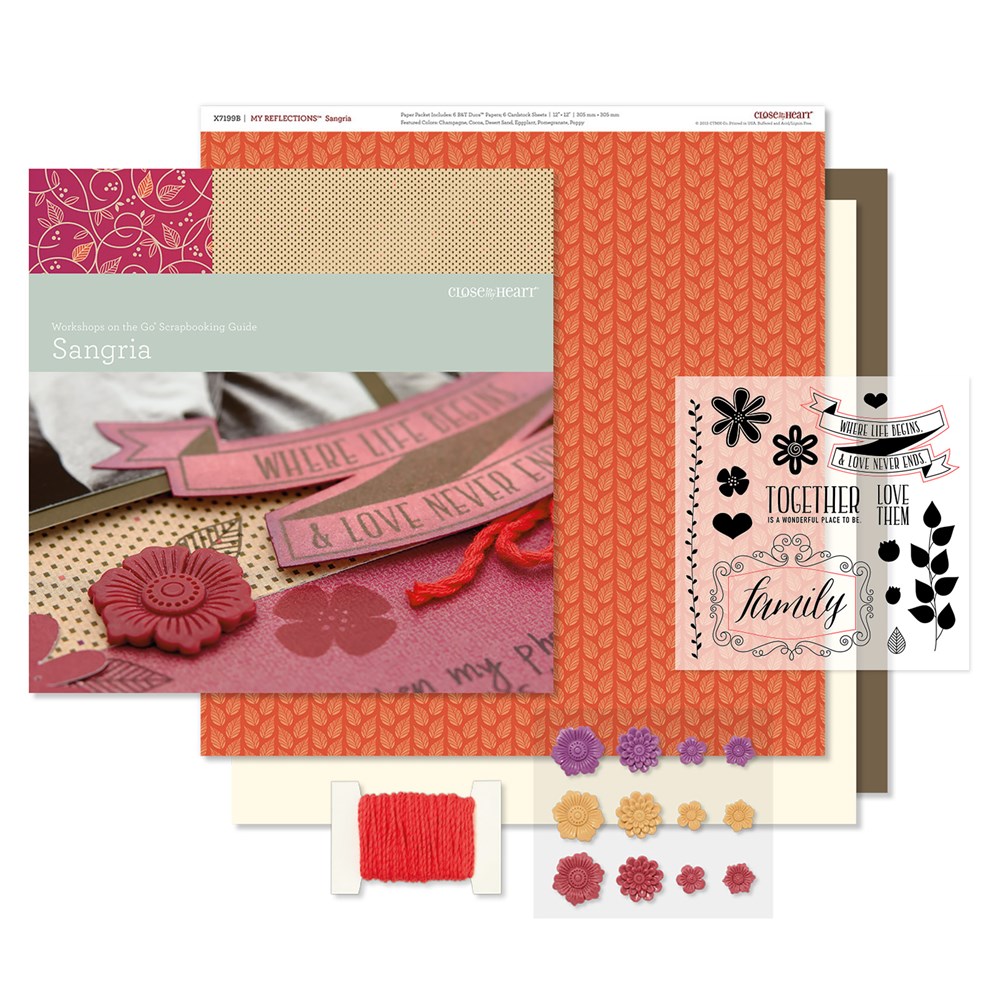
1 – My Reflections™ Sangria Paper Packet (X7199B)
1 – My Acrylix® Sangria Workshop Stamp Set (D-size)
4 – Cardstock Sheets (3 Colonial White, 1 Cocoa)
1 – Sangria Assortment (Z3084) 1 – Poppy Thick Twine (Z3094)
1 – Instructional Brochure
Featured Colors: Champagne, Cocoa, Eggplant, Pomegranate
Hope you have enjoyed stopping by and checking out my creations for this months blog hop. Remember to leave a comment to let me know you stop by or to ask me any questions you may have.
Thursday, October 1, 2015
CHRISTMAS SCRAPBOOKING PAGE LAYOUT WITH CLOSE TO MY HEART TWINKLE STAMP SET
I hope you like the different stamp sets that i have used just to show you how versatile #ctmh stamp sets can be and how you can incorporate many of them in one project.
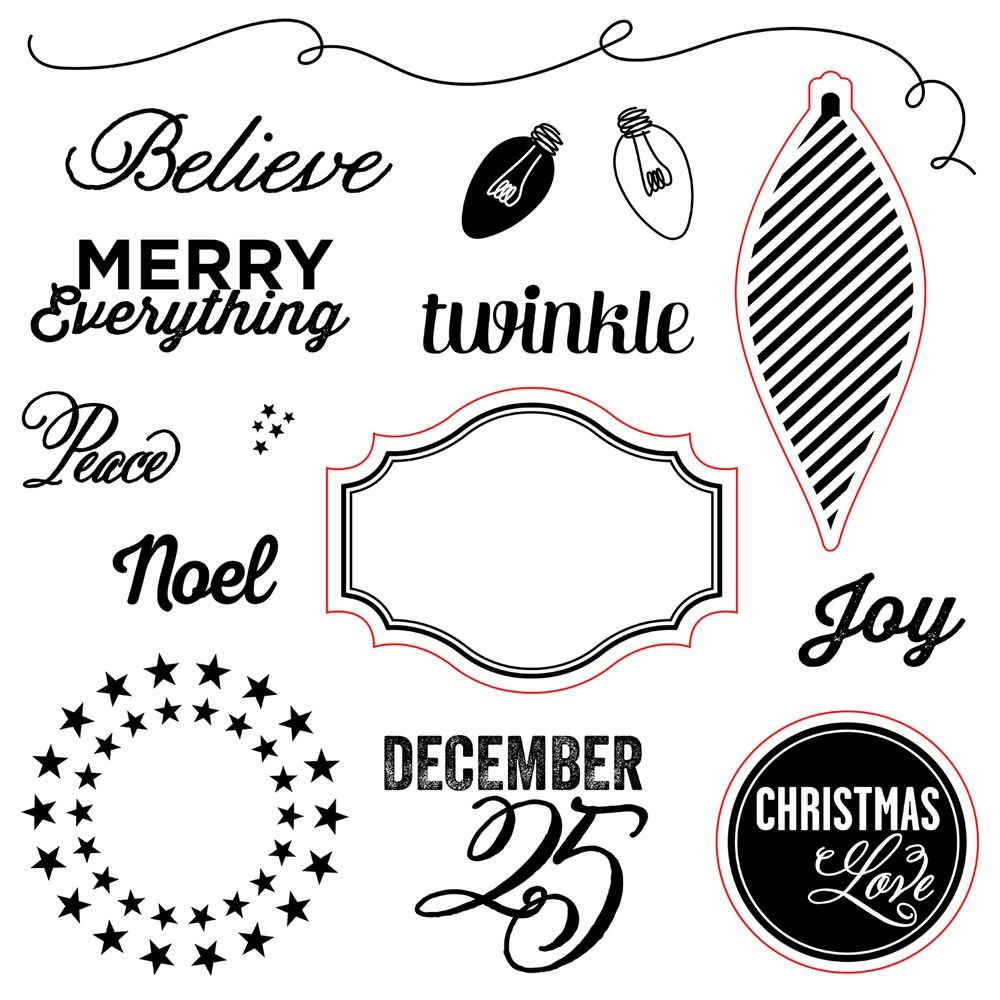
The minute I saw this stamp set, i new exactly what i was going to make. I made this page for our last christmas, Highlighting my youngest and my very first Christmas with a grandchild. I was able to cut out 3 of the Bauble using the cricut artiste cartridge @ 2 3/4" using colonial white cardstock and them stamp and wet emboss it using cranberry ink. The other 2 baulbes i covered with one of the overlays for the bauble. Using the shift key on the cricut machine it gives me an overlay shape for it. So perfect and cute. The december 25 stamp was also stamped on a die cut from the cricut artiste cartridge on Colonial white cut out at 1 3/4"and then to stay with the same page and colour theme i cut out another in Cranberry to mat the label. The cranberry label was cut at 2".
The rope light was first stamped to the right of the page corner using the stamp in the correct position and then i reinked it and turned my stamp upside down so that i could continue on the rope light to the left hand side of the page. A simple but effective technique.
The christmas love circle was again cut out on the cricut artiste @ 1 1/2"and then again matted with a cranberry circle cut @ 1 3/4". Now the clever thing was that when i was looking for my shapes on the artiste i actually came across a pointed ended circle and realised very quickly that it would match the star circle stamp so even though this stamp doesnt have a cricut matched shape this one does the job quite effectively. So i cut it out at 3" wet embossed the star circle stamp and then popped the christmas love stamp on top to give the page some dimension.
The remainder of the Layout comes from the Whitepines Scrapbooking Workshop On The Go kit which made a perfect backdrop for this stamp set and it just blended beautifully. Checkout below the items used to make this page.
If you have a Cricut Expression and the awesome Close To My Heart Cricut Artiste Cricut cartridge collection, and the Cricut Art Philosophy Cartridge so you can cut out any of the shapes that have a red line around them then this stamp set is a must have. Its available for purchase for $27.00 from your CTMH Consultant
or from October 1st - 31st you can purchase it for only $7.50 with EVERY $75.00 you spend.
How good is it to have a cricut cartridge to cut out the same shape as your stamp and coordinating with them, gee i love Close To My Heart. Both SOTM Twinkle and White Pines Workshop on the Go stamp sets co ordinate with the Cricut Artiste cartridge from Close To My Heart. To save time on fussy cutting i was able to cut out the shapes using my cartridge and my machine and was able to stamp on my die cuts straight away and save time.
Collection includes:
1 – Cartridge (700 Images: Themed Projects, Cards, Shapes, Gift Items, and Font)
3 – My Acrylix® D-size Stamp Sets
1 – Basics Cardstock Combo Pack
PRODUCT DESCRIPTION
Cutting versatile, foundational shapes is a breeze with the Art Philosophy Collection. The basic brackets, frames, flowers, and font included are perfect for any project, any time of the year. Use your cuts from this cartridge as embellishments on cards and layouts to make your artwork shine. And don't forget to use the coordinating stamps for more creative fun!
Collection includes:
1 – Cartridge (700 Images: Basic Shapes, Gift Items, and Font)
3 – My Acrylix® D-size Stamp Sets
1 – Enchantment Cardstock Combo Pack
1 – My Reflections™ White Pines Paper Packet (X7200B)
1 – My Acrylix® White Pines Workshop Stamp Set (D-size)
4 – Cardstock Sheets (2 Colonial White, 1 Chocolate, 1 Glacier)
1 – White Pines Assortment (Z3077)
1 – Red Enamel Gems (Z3090)
1 – Instructional Brochure Featured Colors: Chocolate, Cranberry, Fern, Colonial White
Use the materials and instructions in this kit to create two beautiful 2-page layouts. Stamp images outlined in red coordinate with the Cricut® Artistry Collection (Z3167).
Hope you have enjoyed stopping by and checking out my creations for this months . Remember to leave a comment to let me know you stop by or to ask me any questions you may have.
Labels:
CRICUT ART PHILOSOPHY,
CRICUT ARTISTE,
MY ACRYLIX - TWINKLE,
SCRAPBOOKING,
WOTG - WHITE PINES
Subscribe to:
Comments (Atom)


